- français
- English
Prototype I
For our first prototype, we decided to remain open to either Arsenic or E.Coli detection. We did background research on different methods, to have a panel of what was available and matched our criteria. We wanted to create a device open-source, not too expensive, easy-to-use and portable.
From all the methods we found, we chose fluorescence, which seemed to be the easiest technique to take out of the lab and allowed to detect both Arsenic and E.Coli.
Fluorometer
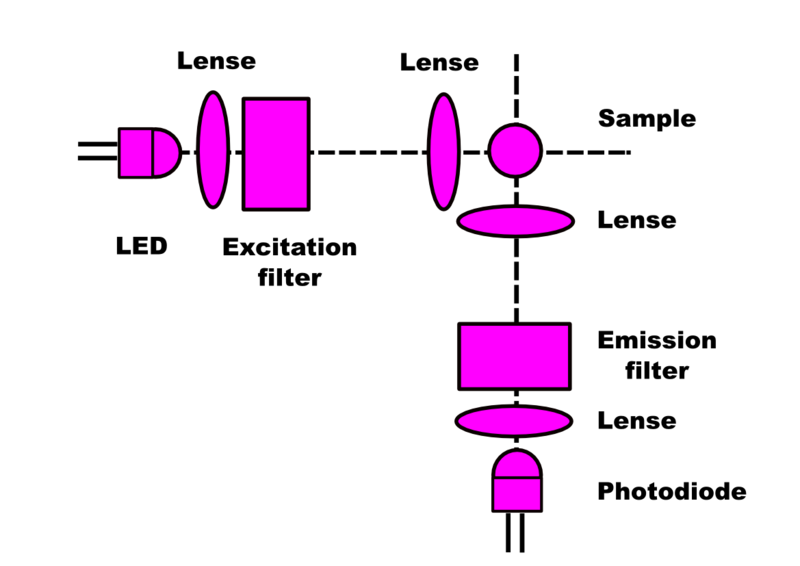
A typical fluorometer looks like that :
http://openwetware.org/wiki/Citizen_Science/Open_Fluorometer_Project/Resources
The fluorescence is measured at an angle of 90° from the light source.
The light from the LED passes through a lense to be focused and then through a filter, to only let the excitation wavelength pass through. That filtered light will excite the sample, which will emit at another wavelength and will then be detected. In general, photodiodes or photomultiplier are used as detectors, but they are quite expensive. That is the reason why we looked for an alternative : a digital camera. Indeed, all camera contains an RGB filter, which can be used to detect only the range of wavelength we want to detect. And for the LED, we used one that emits at the range of excitation wavelength we needed, so we could eliminate the filter from the list of elements to purchase.
Our device
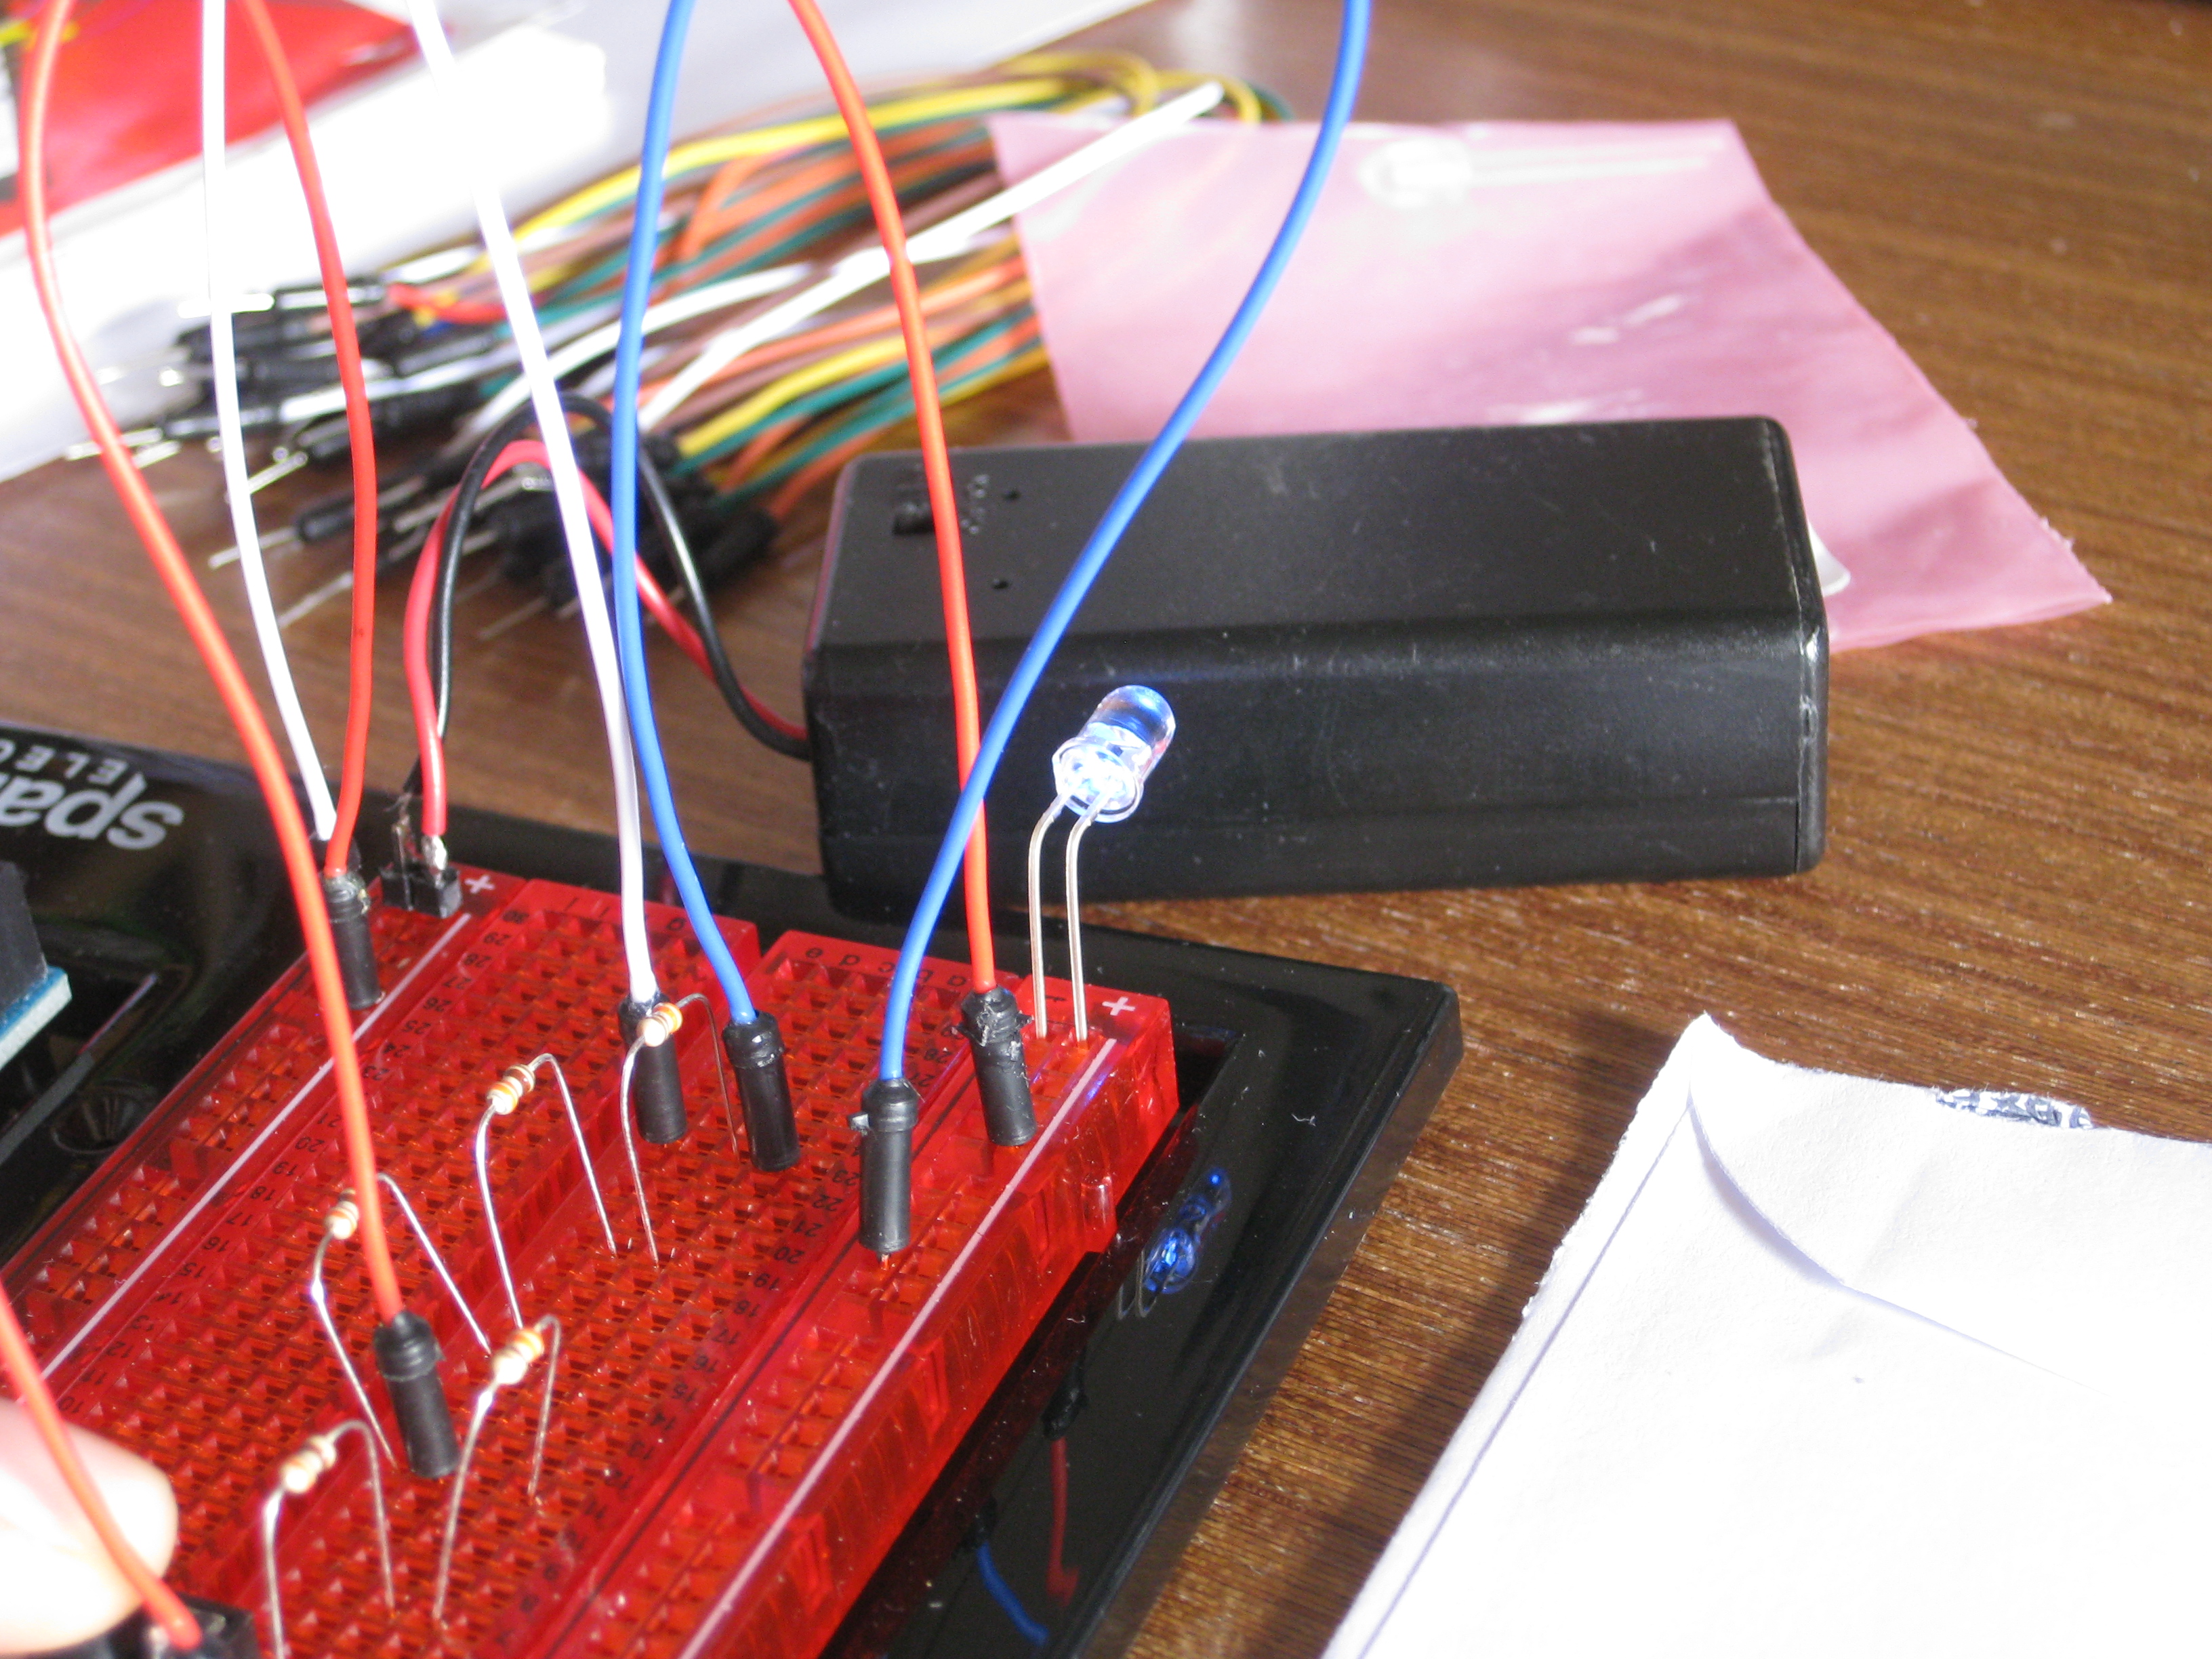
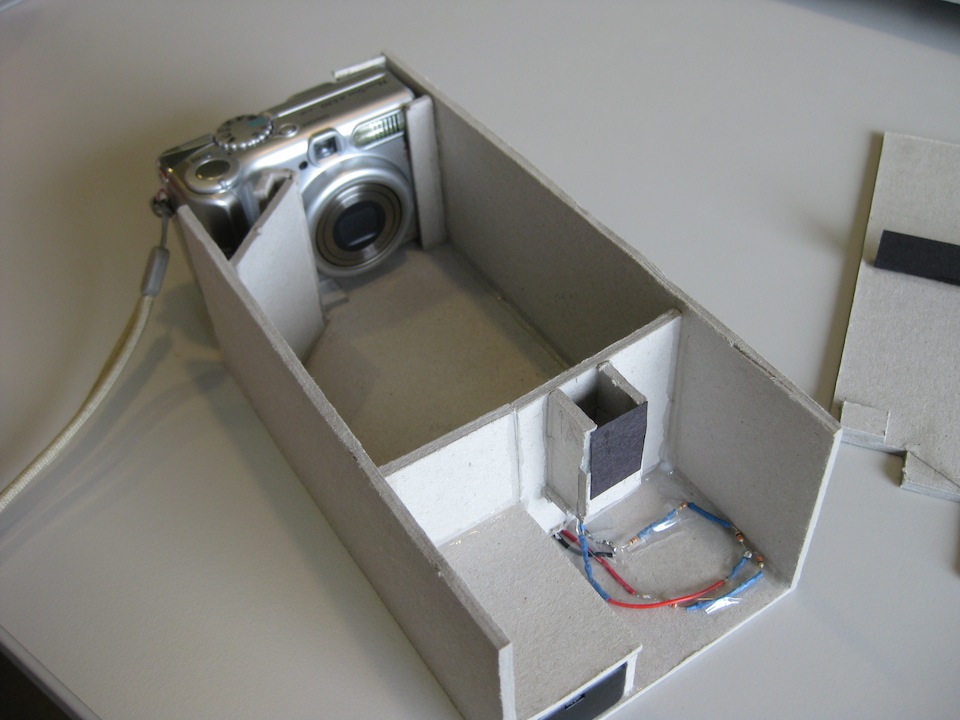
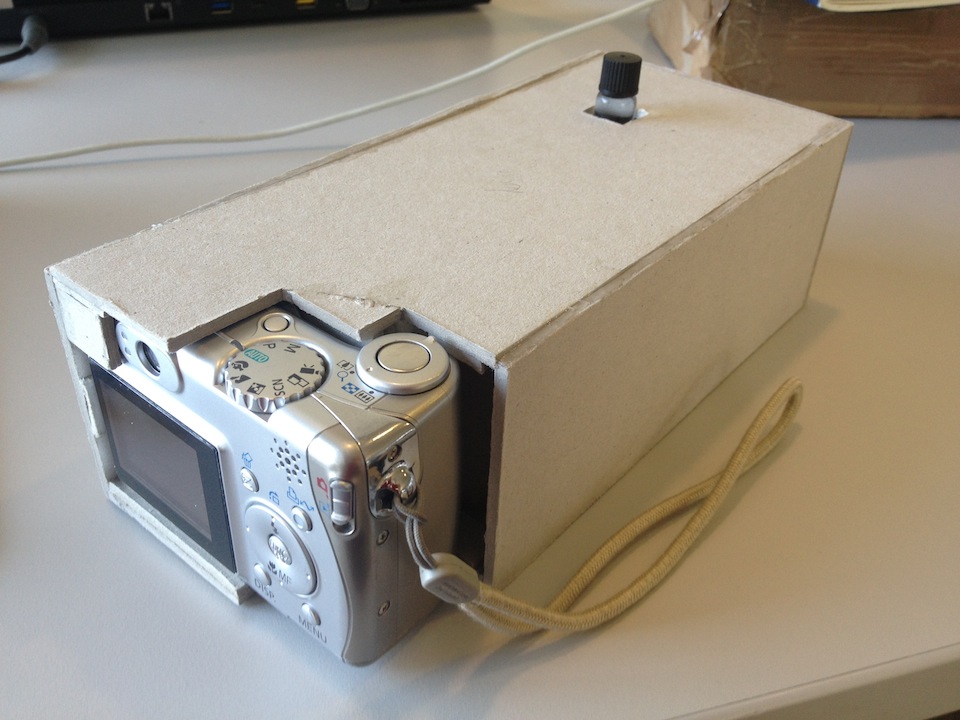
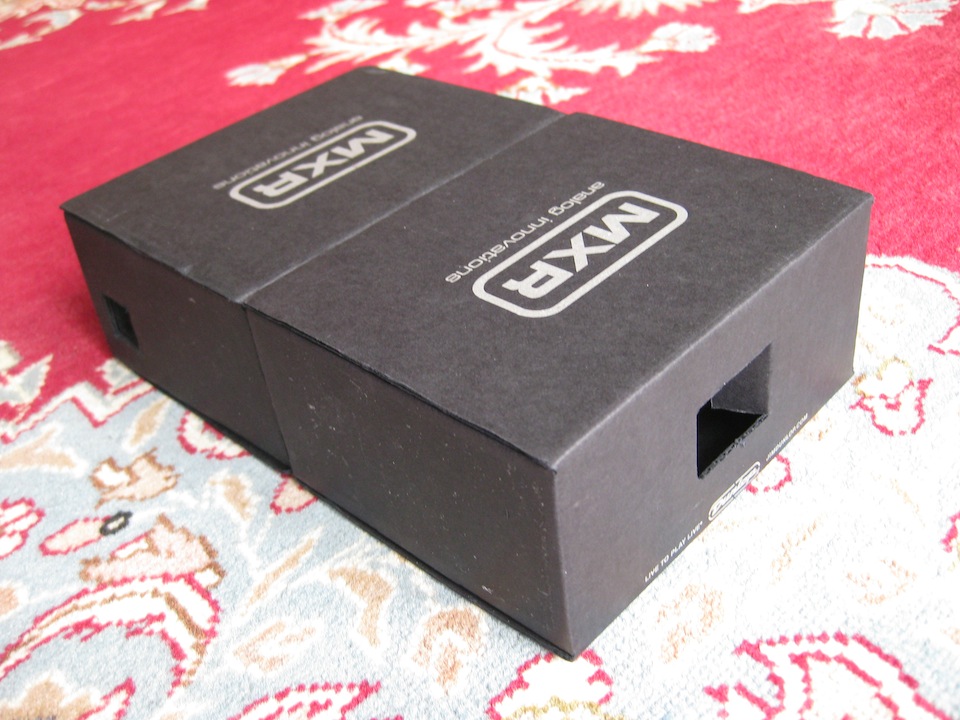
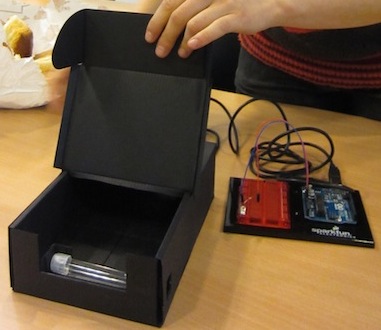
For the actual prototype, we first used two paperboard boxes sticked together with two holes for the camera and the LED. The box is closed so no external light would disturb the measurement. Inside, there is a horizontal place for the sample-holder and ouside we used an Arduino as the LED current source.
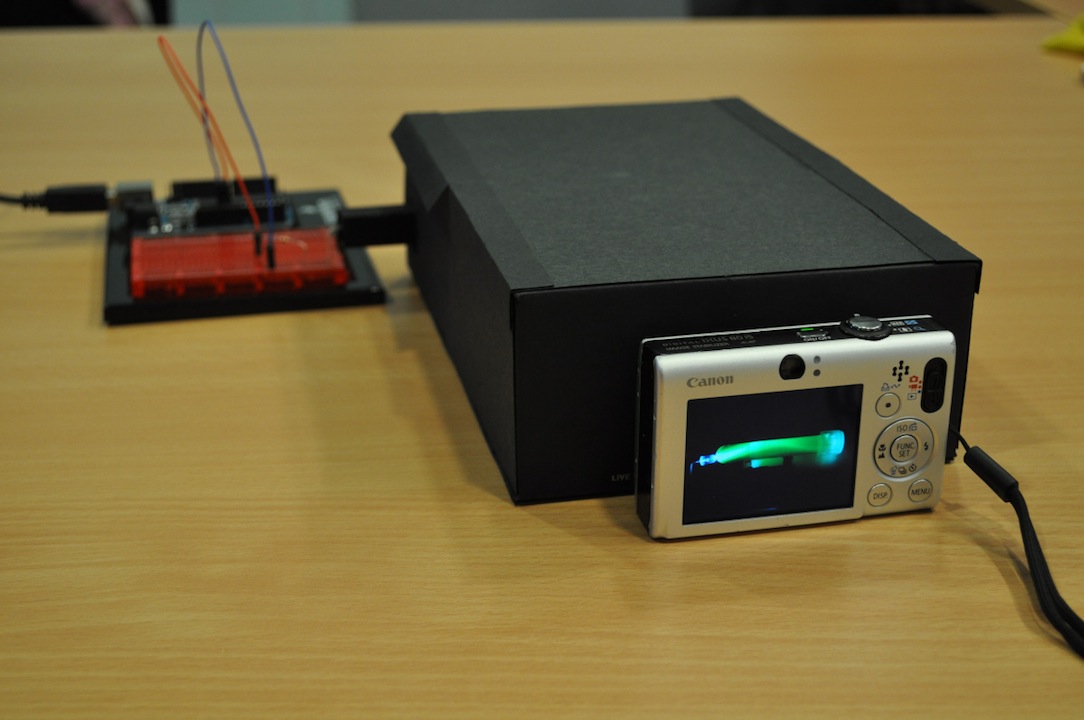
To analyze the data, we used ImageJ, a free/open-source image processing software. We used the fact that it is possible to split an image according to the different red/green/blue filter. So first, we split the color channels and kept only the green composant. Then, we substracted the blank (green) to eliminate the noise (to make sure no fluorescence of the blank would interfere with our sample). And finally, we measured the pixels intensity of the sample in a specific region we chose (drawing of a rectangle to be more precise). After the measure, the output of the software is given in the form : AREA (number of pixel analyzed), MEAN (sum of all the intensities divided by the Area), MIN (minimal pixel intensity) and MAX (maximal pixel intensity). The parameter we took into account are the MEAN and the AREA, the first one corresponds to the fluorecence intentity and the second one was used to determine the error made each time we draw a rectangle.

To automate the camera, we used CHDK (canon hacking development kit), an open source software that allow script writing and additional features that are in principle not available in cheap cameras. Thus, with this program, we were able to set constant parameters, as the exposure time (or shutter speed) to 1 sec and ISO to 0.
We did not write any script for the camera because of a lack of time, but we were able to make one for ImageJ. The purpose was to always measure in the same area (fixed rectangle) and analyze the images automatically. To download the script and learn how to use it, click here.
As we needed to go in a lab to deal with bacteria, we did the first trials with dextran FITC (a branched polysaccharide coupled with fluorescein isothiocyanate, which have excitation/emission spectrum of approx. 495/519 nm) to only test the fluorescence detection. We used a 470nm LED, for this experiment.
We then planned to use 380nm LED for wild-type GFP detection, but discovered that the reporter was expressing eGFP that excites at 488nm. So, we took the 470nm LED back, that corresponds to 70% excitation.
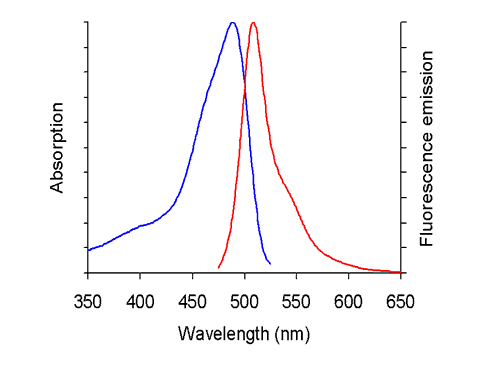
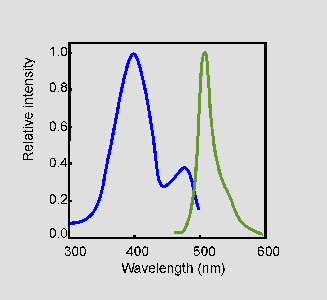
eGFP spectrum at pH 7 and wild-type GFP spectrum
http://www.invitrogen.com/site/us/en/home/support/Product-Technical-Resources/Product-Spectra.EGFPpH7.html, http://www.cryst.bbk.ac.uk/PPS2/projects/jonda/chromoph.htm
Concerning E.Coli detection, we had to find a 280nm LED, but we found that this wavelength is more complex to produce, making the price of the LEDs very high (about 400 – 250 euros). As our principal criterium is to create a non-expensive device, we dropped the idea to detect E.Coli for now.
Improvements
While testing our first prototype, we observed that some things had to be improved. For example, a lot of the components are outside of the box (like the LED and the camera), which makes it very difficult to take a fixed picture, because everything moves a little bit at each measure. The sample is positionned horizontally, which we discovered, is not the best orientation, because of light scattering, but also because we have to open the box for each sample. This is another factor that disturbs the system by making it move. Then we need a computer for the alimentation of the Arduino (that only acts as a battery).
So the improvements we made are :
- The addition of a battery to replace the Arduino and a switch, to be able to turn the LED on and off individually
- The fixation of the camera inside the device to obtain more precise pictures
- And finally put the sample in a vertical position to allow an easiest change between different samples
