
- français
- English
3D printing of the connector
We first tried to print only the connector of the double cap.
We performed it at the Hackuarium, with the help of Sam Sulaimanov from Octanis, with a Prusa Mendel I3 as 3D printer. It uses the “Fused Deposit Modeling” method. This technique involves melting a plastic filament (usually ABS or PLA) through a nozzle heated to a temperature between 160 and 270°C.
To print the connector, we used PLA filament. This polymer is entirely biodegradable.
We used Cura (free software) to define the caracteristics of the printing :
- Temperature : 220°C (for PLA)
- Material : PLA filament (1.75mm)
- 4mm nozzle
- 190*190 bed (temperature 70°C)
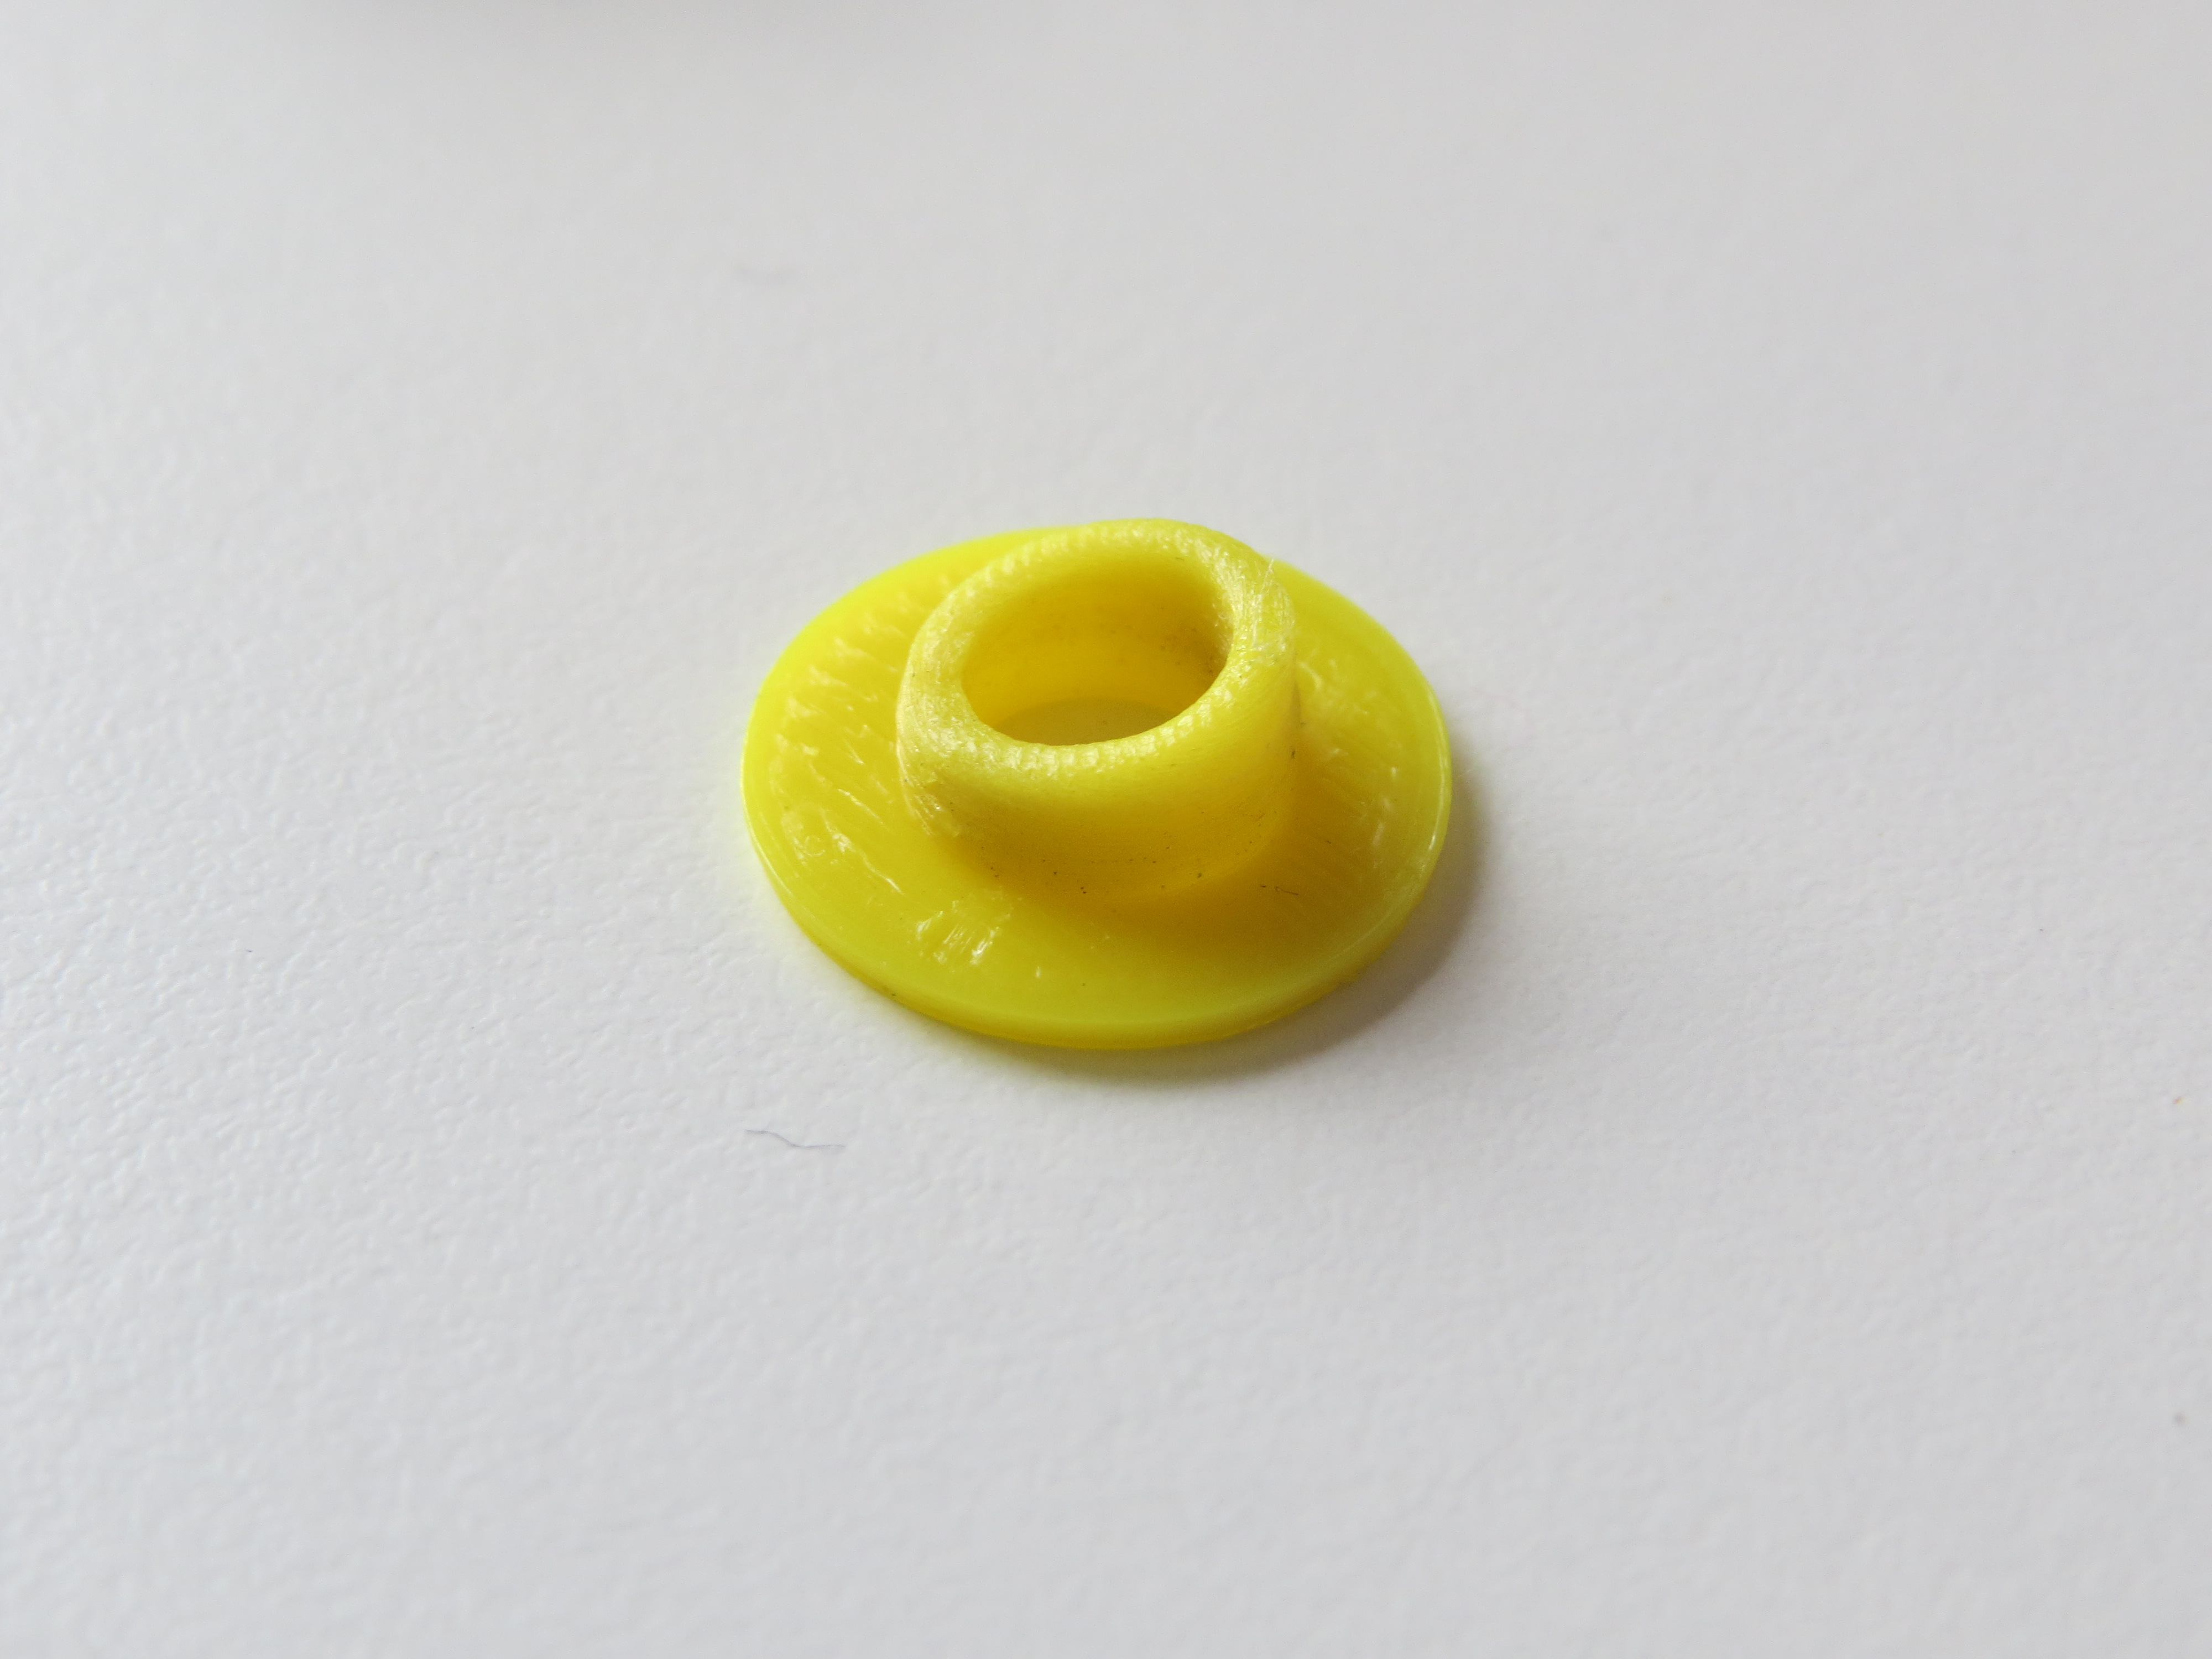
The 3D printed connector (thickness 1mm)
The printing took 11min, for 0.46 meter of filament (1gram). The price, estimated from the cost of a spool of filament, is about 0.04CHF. We must add the price of the two vials, that is to say 0.54CHF.
We then have to glue the connector between two preexisting vial caps.
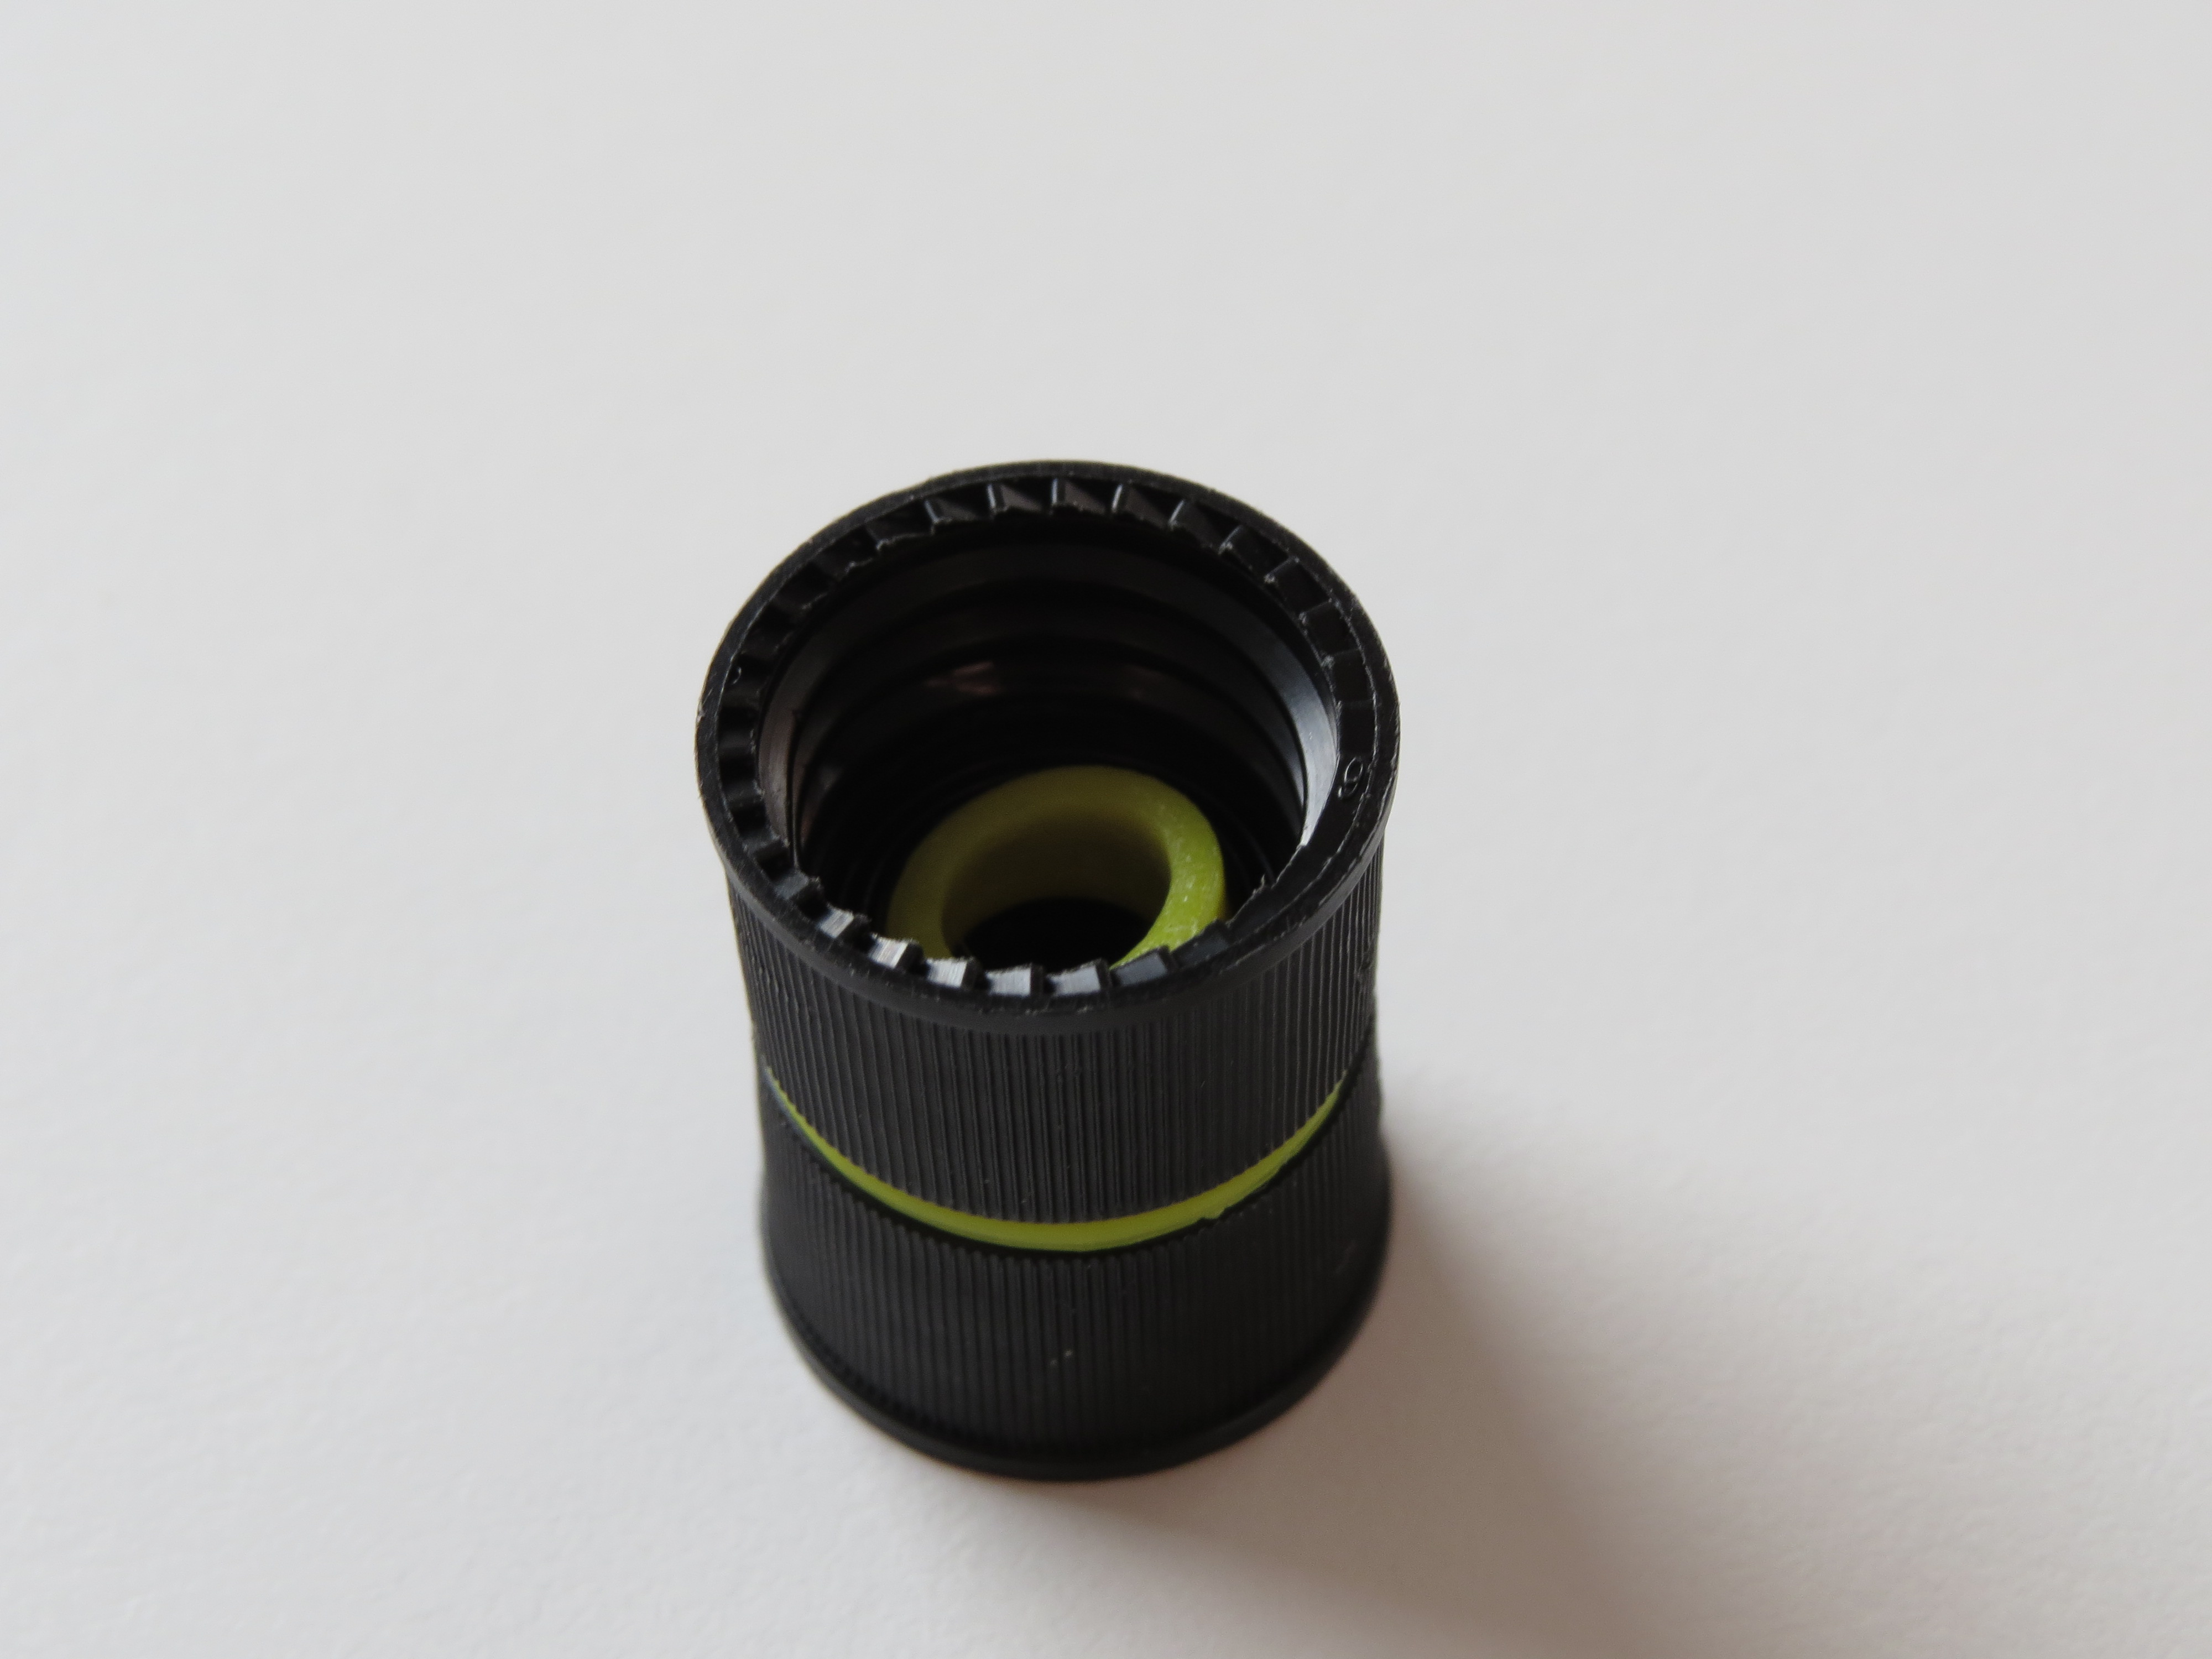
The obtained double cap
After having glued the two preexisting caps with the connector, we can make some tests.
We position the tip of the connector in front of the start of the screw pitch of the cap. As expected, the aluminum seal is pierced after we started to screw.
This proposition presents a disadvantage : we have to find a glue which resists to water, is strong enough and hermetic. For example, with Patex glue, the device was broken after about 20 uses.
We can also estimate that because it is in three parts, it is less hermetic.