|
Navigation
 This wiki
This page This wiki
This page
|
2.Preprocessing If you click on
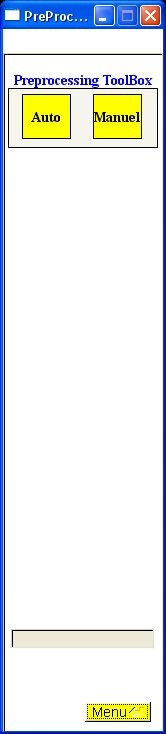 The goal of this step is to select brain tissues and exclude artifacts such as overlapping sections. You can choose 2 options: execute the preprocessing manually or execute it automatically.
If you choose the "Auto" option, the following options appear:
 As explained on the online help, first load images and then press the compute button. A certain number of filters are applied on images, to understand this, please refer to the technical report.
Once images are automaticaly cleaned and selected, click on the
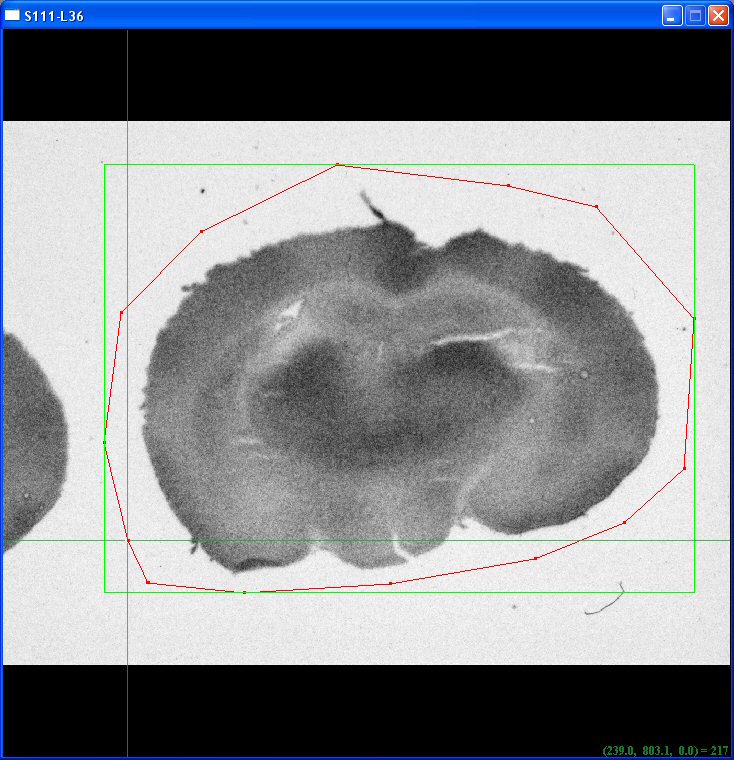
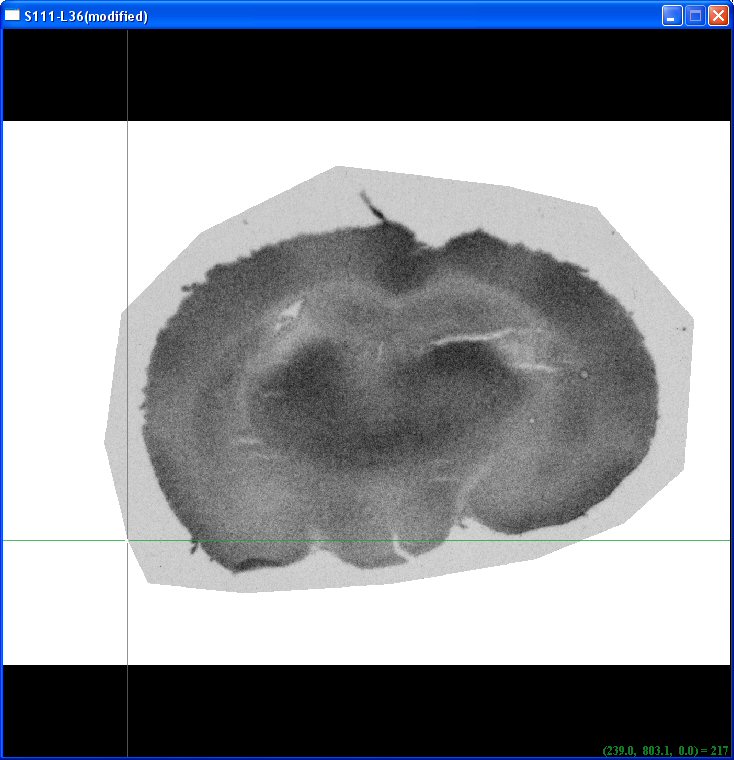
 button to check the previous processed results. For certain cases, sections are not separated. You have to do it manually before the 3D reconstruction step. By clicking on the manual button, the following options appear : button to check the previous processed results. For certain cases, sections are not separated. You have to do it manually before the 3D reconstruction step. By clicking on the manual button, the following options appear : 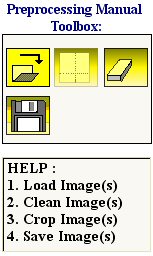 First load images, then select the ROI (region of interest) by clicking with the left mouse button. To close the polygon, click with the right button of the mouse. Take a look to the following example :
 Then click on
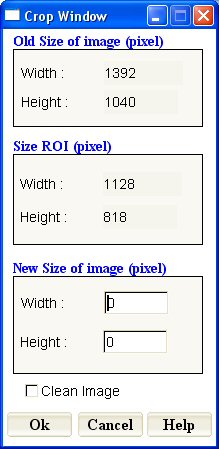 Give the new size of the image, I recommend to keep the same as the old one, in this case it would be 1392*1040 and check the clean button. The following result should be obtained :
 Press the save button.
Once you have preprocessed all the images, press the return button to go back to the main window.
|
Share |